We rarely reach many days into March before the urge to make a little more out of the garden mist series takes hold of me. And fortunately it coincides with the fact that it is right around there that you can start sowing tomato plants.
Over the years, it has fluctuated a bit if I have had the surplus to try my hand at sowing the plants. When you germinate them inside, it can be very difficult to control their growth, and often you end up with some tall, very thin plants, which are extremely fragile and which have a hard time getting started when you plant them in the greenhouse. (if they survive that long at all).
But this year I sowed myself - and for once I have not regretted it!
The seeds were selected and bought from the English webshop Thompson & Morgan, which I am already a huge fan of. All the seeds I bought from them have been really good to germinate - and that also applied this time around. At the same time, I had also put two growth candles up in the window sill in the bedroom, which could help the plants a little on the way, as well as a little heat to put in the bottom of the plant tray - and the fact that I was able to give it extra light and warmth has meant that I have been standing with some really nice tomato plants this year.
However, if you do not have access to artificial light, try following these tips when sprouting tomatoes:
- Give the plants good light, but let them dry out a bit from time to time (just so the leaves become a little loose). It holds the growth upwards a bit.
- Use a sprayer to irrigate at the beginning so you do not drown the plants
- Apply liquid fertilizer once a week when the plants have reached a height of about 4-5 cm.
- Pot about as soon as the plants start to grow large.
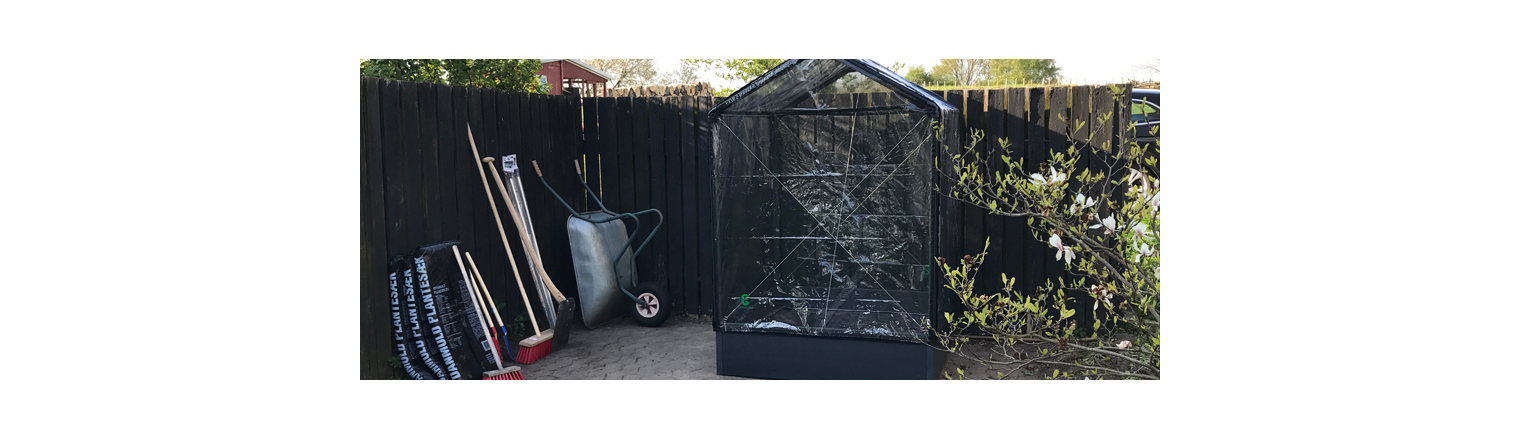
Right at the beginning of March, the first batch of tomato plants came out in the regular greenhouse, where they already have a good grip. The second team was just put in their pots in the greenhouse while I got together one of GrowCamp's popular tomato beds. If the conditions are different, it should be able to yield up to 85 kg of tomatoes, despite the fact that it is no more than 120 x 120 cm in size.
I got it together in one day - with coffee in hand and lots of minor interruptions along the way. And even though the first look at the instructions made me consider putting something stronger than coffee in the cup, it went fine. Everything fits together and if you just take it point by point on the instructions for use, you should probably get to the finish line fine. There were no phases in the collection, I perceived as difficult, and the kids even looked past and helped.
Now all the last tomato plants have come over in the new GrowCamp, and then it will be exciting to see how they go. At first glance, I think it's pretty ingenious with the dark net inside the plastic, as it takes a little off from the sun, so there are no plants that get burned off too much. At the same time, it is of course also a big plus that the plastic on the sides can be removed on the particularly hot days.
The status is now that I have tomato plants both in the ordinary greenhouse, in GrowCamp's tomato bed and in a small wall greenhouse made of plastic for DKK 100. All plants are sown at the same time, planted in the permanent place at only a few weeks intervals, and they stand roughly same place in the garden - with roughly the same light and wind conditions. It should be fun to follow the development…


-1.backdrop.png)
-1.backdrop.png)